











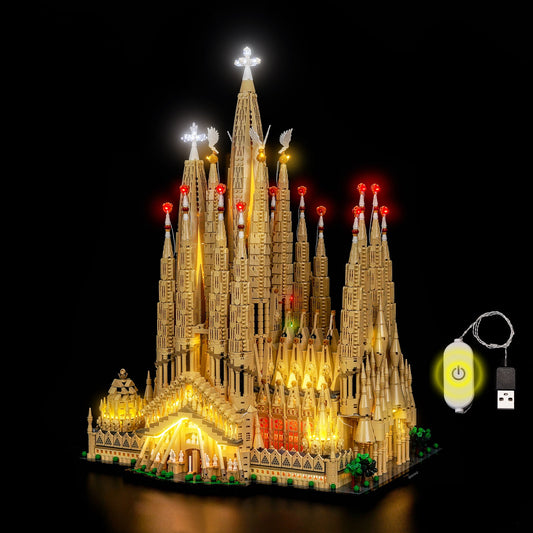


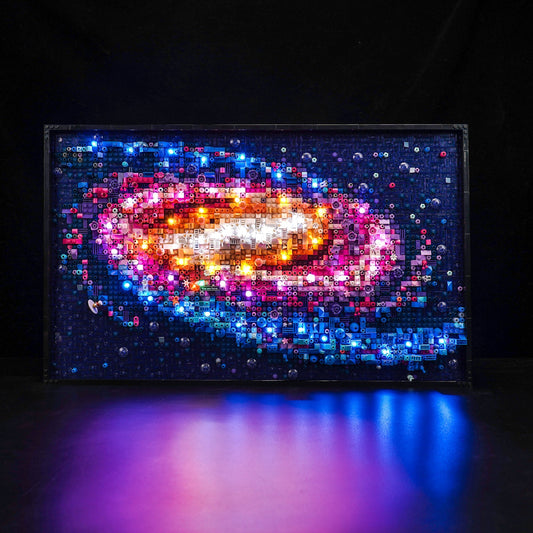

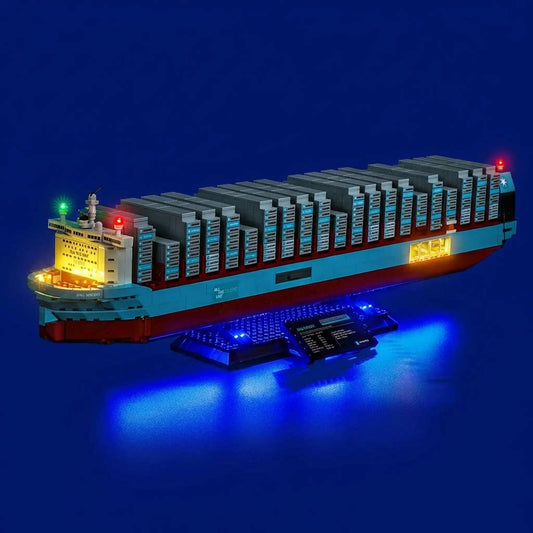

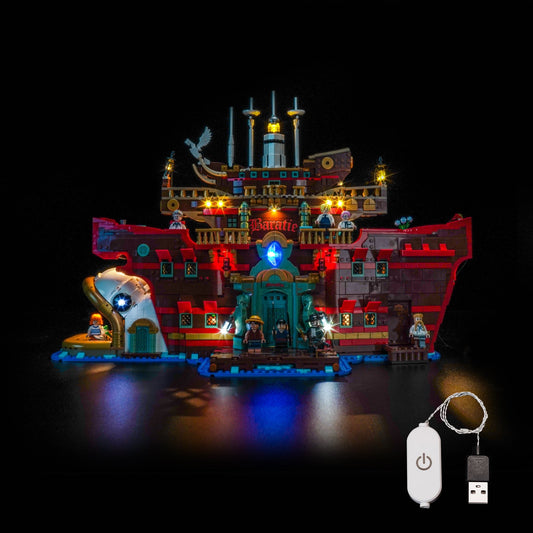




LED-Beleuchtungsset für LEGO Todesstern 75419: Test, Einbau & die besten Tipps für Episode IV Fans
10 Nov 2026
0 Kommentare
When you finish placing the final plate on the colossal LEGO® Star Wars Death Star Set 75419, the sheer scale of the 9,023-piece build is undeniably striking. As an AFOL with a decade of workshop experience examining production tolerances, material finishes, and precision aftermarket modifications, I have seen monumental builds command living rooms across Germany. Yet, placed inside a standard Vitrine or displayed against a neutral wall in a Munich or Hamburg study, even the galaxy’s ultimate battlestation can quickly dissolve into a flat silhouette of grey ABS plates. Wer ein echtes Ausstellungs-Highlight sucht, erkennt schnell: Ein gigantisches Modell wie dieses entfaltet erst als LEGO mit Beleuchtung seine wahre visuelle Wucht.
The cinematic power of Star Wars: Episode IV – A New Hope relies on dramatic chiaroscuro: the eerie phosphor glow of the Superlaser control room, the stark white interrogation corridors, the crimson warning panels of the detention block, and the deep industrial recesses where Obi-Wan Kenobi disconnects the tractor beam. To bridge the gap between static grey plastic and cinematic authenticity, installing dedicated Licht für LEGO is a natural evolution. Rather than settling for a dark shelf presence, transforming your battlestation into an illuminated centerpiece or an ambient LEGO Lampe brings the imperial menace directly into your room.
In this comprehensive technical review and build guide, we evaluate the custom LED-Beleuchtungsset für LEGO® Star Wars Todesstern 75419, examine the engineering behind its components, compare version configurations, and provide step-by-step installation practices tailored to the discerning German collector searching for the ideal Beleuchtung LEGO solution.

1. The Core Build: Engineering and Display Challenges of LEGO® 75419
LEGO® 75419 stands as an engineering benchmark for the Star Wars Ultimate Collector Series and playset hybrids. Recreating both the sphere's exterior lattice and multi-tiered interior decks, the model incorporates classic Episode IV environments:
-
Deck Level 1 & 2: The subterranean trash compactor with moving wall mechanics and the maintenance access corridors.
-
Deck Level 3: The iconic Detention Block AA-23, the command bridge stations, and the primary hangar deck accommodating imperial craft.
-
Upper Level: The iconic Superlaser convergence dish, terminal tracking suites, and central core shafts.
       [ Upper Core: Superlaser Dish & Primary Firing Array ]
                                 │
     ┌───────────────────────────┴───────────────────────────┐
     │                                                       │
[ Detention Block AA-23 ]                           [ Turbo-Laser Battery ]
     │                                                       │
[ Tractor Beam Terminals ]                          [ Primary Hangar Bay ]
     │                                                       │
     └───────────────────────────┬───────────────────────────┘
                                 │
       [ Lower Core: Trash Compactor & Power Distribution ]
The Display Dilemma: The "Grey Monolith" Effect
While LEGO’s structural integrity relies on rigid injection-molded Acrylonitrile Butadiene Styrene (ABS), display environments introduce physical lighting challenges:
-
Photometric Shadowing: The dense floor-to-ceiling multi-tier layout blocks ambient room lighting from reaching inner play chambers. Without targeted LEGO Licht, details inside the detention cells and maintenance shafts vanish entirely.
-
Loss of Depth Perception: Standard 4500K ceiling bulbs flatten the stepped relief of exterior greebling. High-grade LED lights for LEGO create sharp drop shadows that bring structural relief to life.
-
Cinematic Disconnect: In Episode IV, terminal interfaces feature distinct operational hues. Without active LED in LEGO components, the colored transparent 1x1 plates remain dark and inert.
Adding an engineered light kit solves these issues by placing focused LEGO LED micro-emitters directly into structural anchor points, turning a dormant plastic sculpture into dynamic art.

2. Technical Comparison: Unlit Model vs. Precision LED Installation
The technical divergence between the standard, unlit LEGO® 75419 build and one upgraded with a dedicated aftermarket system is evident across visibility, accentuation, and display utility:
| Evaluation Criterion | Factory Unlit LEGO® 75419 | |
| Interior Chamber Visibility | Poor; inner chambers (Trash Compactor, Tractor Beam) remain obscured in ambient room light. |
High; focused micro-diodes deliver dedicated lumen output into each compartment using custom LEGO LED components.
|
| Material Accentuation | Monochromatic appearance; light-grey and dark-grey ABS blend together uniformly. |
Enhanced structural relief; sharp directional Licht für LEGO creates contrast across exterior greebling.
|
| Cinematic Film Accuracy | Passive; transparent green, red, and blue studs require external bounce light to show color. |
Active; 520nm green LEDs and red accent lines accurately match Episode IV scenes with dedicated LEGO Licht.
|
| Cable Management | N/A (Standard factory condition). |
Integrated 0.8mm insulated multi-strand copper wire concealed between stud tolerances for seamless LEGO with LED integration.
|
| Heat Dissipation & Safety | Zero thermal footprint. | Low-temperature solid-state LEDs mounted to custom ABS elements; minimal heat dissipation under continuous operation. |
| Display Versatility | Dependent entirely on external spotlights or display cabinet fixtures. |
Self-contained lighting array; acts as a functional LEGO Lampe for showcases and low-light home offices.
|

3. Product Anatomy: Materials, Variants, and Component Specs
A professional-grade light set must respect the clutch power and material limits of original LEGO® elements. An aftermarket LED lighting for LEGO upgrade should never warp studs, crack anti-studs, or create uneven plate seams.
Component Material Analysis
-
Structural Carrier Blocks (ABS-Kunststoff): All mounting bricks, clip housings, and socket plates are molded from high-grade ABS plastic matching standard clutch tolerances. This guarantees that every integrated LEGO Light LED element sits flush without mechanical tension.
-
Electrical Conduction Pathways (Kupfer & Kupferdraht): The kit utilizes multi-strand flexible copper wire sheathed in ultra-thin insulation (outer diameter under 0.8 mm). Copper provides optimal conductivity with minimal resistance across long branch runs, allowing lines to route through plate gaps without causing seam separation.
-
Micro Solid-State Diodes: Surface-mount device (SMD) LEDs selected for color temperature consistency, operating on low-voltage 5V DC power via standard USB input terminals. These LED Lego Lights provide reliable, flicker-free illumination across all decks.
Detailed Configuration Breakdown
To accommodate different collection setups and operating preferences, two configurations are available:
1. Classic-Version
-
Modell-Typ: Classic-Version für LEGO® Star Wars Todesstern 75419
-
Verwendete Materialien: Hochleitfähiger Kupfer / isolierter Kupferdraht, langlebiger ABS-Kunststoff
-
Warum diese Variante ideal ist: Diese Konfiguration eignet sich perfekt für Puristen und Vitrinen-Dauerbeleuchtungen, die eine konstante, ausfallsichere Grundausleuchtung ohne komplexe Funkmodule bevorzugen. Wer ein verlässliches System sucht, um sein LEGO mit Beleuchtung dauerhaft als Vitrinen-Highlight strahlen zu lassen, trifft hier die richtige Wahl.
-
Produkt-Details: Entdecken Sie die LED-Beleuchtungsset für LEGO® Star Wars Todesstern 75419 Classic-Version, um alle Kammern dauerhaft und harmonisch zu illuminieren.
2. Fernbedienungs-Version (Remote-Controlled)
-
Modell-Typ: Fernbedienungs-Version für LEGO® Star Wars Todesstern 75419
-
Verwendete Materialien: Mehradriger Kupfer / flexibler Kupferdraht, passgenauer ABS-Kunststoff, integrierter RF-Empfänger
-
Warum diese Variante ideal ist: Diese Version bietet maximale Flexibilität bei freier Platzierung im Raum, da Lichteffekte, Dimmstufen und Sektorenschaltungen bequem aus der Distanz gesteuert werden können, ohne die Vitrine zu öffnen. Sie ist die ultimative Ausbaustufe für alle, die nach fortschrittlicher Beleuchtung für LEGO mit drahtloser Zonensteuerung suchen.
-
Produkt-Details: Sichern Sie sich die LED-Beleuchtungsset für LEGO® Star Wars Todesstern 75419 Fernbedienungs-Version für ein interaktives Lichterlebnis mit individueller Zonensteuerung.
4. Application Matrix: Matching Variant to Display Environment
Choosing between the basic and remote versions depends directly on your display furniture, room layout, and power accessibility:
| Display Environment & Collector Objective | Recommended Kit Variant | Model & Material Composition | Primary Functional Advantage |
| Geschlossene Glasvitrine (z. B. Moducase / Custom Acryl) | Classic-Version | Modell 75419-C; Kupfer / Kupferdraht & ABS-Kunststoff |
Dauerbetrieb über 5V-Netzteil; wartungsfreie Beleuchtung LEGO ohne Batteriewechsel.
|
| Offenes Wohnzimmer-Regal / Sideboard | Fernbedienungs-Version | Modell 75419-RC; Kupfer / Kupferdraht & ABS-Kunststoff |
Mehrkanal-Dimmfunktion; verwandelt das Modell bei Nacht in eine dimmbare LEGO Lampe.
|
| Büro / Arbeitszimmer (Präsentations-Fokus) | Fernbedienungs-Version | Modell 75419-RC; Kupfer / Kupferdraht & ABS-Kunststoff |
Schnelle Umschaltung von dezentem Raumlicht zu dynamischem LEGO LED Flutlicht per Handsender.
|
| Museums- / Ausstellungsaufbau | Classic-Version | Modell 75419-C; Kupfer / Kupferdraht & ABS-Kunststoff |
Robuste Licht für LEGO Festverdrahtung ohne Signalüberlagerungen bei ganztägigem Dauerbetrieb.
|
5. Engineering & Installation Guide for Episode IV Fanatics
Installing an aftermarket LED Beleuchtung LEGO kit across 9,000+ pieces requires a patient, methodical workflow. With fragile Technic inner support rings and tight plate connections, proper technique prevents damaged lines and alignment issues.
+-------------------------------------------------------------+
|               INSTALLATION WORKFLOW PHASES                  |
+-------------------------------------------------------------+
| Phase 1: Pre-Check (5V DC USB power bench testing)         |
|                         ↓                                   |
| Phase 2: Structural Routing (0.8mm copper wire along studs) |
|                         ↓                                   |
| Phase 3: Zonal Integration (Superlaser, Decks, Core)        |
|                         ↓                                   |
| Phase 4: Final Expansion Hub Consolidation                  |
+-------------------------------------------------------------+
Pre-Installation Bench Test
Before detaching any brick sections, spread the light strings onto a clean work mat. Plug the main USB terminal into a 5V/2A power supply (or a standard European USB wall adapter). Check every emitter string:
-
Verify constant luminescence across all green Superlaser diodes.
-
Check cold-white corridor light bars for uniform brightness.
-
Confirm red warning diodes flash or illuminate without intermittent dropouts.
-
For the Fernbedienungs-Version, pair the handheld remote and test dimming curves across channels A, B, and C to ensure all LED lights LEGO respond reliably.
Sektor 1: Der Superlaser & Primärfokus (Episode IV Signature Effect)
The defining feature of the Death Star is the concave dish that channels synthetic kyber crystal energy into a planetary destruction beam.
-
Carefully remove the central trans-green 2x2 round cone at the focal nexus.
-
Route the 0.8mm copper wire through the hollow stud core of the supporting Technic framework.
-
Install the high-output green SMD emitter seated directly within an ABS-compatible replacement LEGO light brick.
-
Dress the insulated copper wire flat across the plate valley. Press the surrounding wedge plates back into place, taking care that the wire sits parallel between studs, not pinched under a stud edge.
Sektor 2: Traktorstrahl-Steuerung & Hangardeck
In the lower quadrants, Kenobi's sabotage takes place over narrow service bridges:
-
Access the tractor beam tower by carefully unclipping the external superstructure segment.
-
Position the deep-blue and cool-white micro-LED boards onto the console stations using the pre-mounted ABS adapter plates.
-
Guide the copper wiring down toward the sub-floor ballast level to ensure seamless LED in LEGO wire paths. Keep wiring runs grouped along structural Technic beams using included self-adhesive wire clips.
Sektor 3: Inhaftierungsblock AA-23 & Müllpresse
The detention sector demands stark, high-contrast illumination:
-
Run overhead cold-white micro light strips along the ceiling arch bricks of the cell block corridor.
-
Route the connecting bus lines down the interior wall cavity toward the trash compactor chamber below.
-
Anchor the ambient yellow-red warning diodes into the compactor ceiling. The low-profile copper wire must allow the manual wall-closing gear mechanism to travel along its gear rack without catching, ensuring your customized LEGO with LED lights maintains complete functional articulation.
Cable Concealment Rules
-
Rule 1 (The Stud Gap Rule): Never route an insulated copper wire directly across the crown of a LEGO® stud. Always lay it in the recess between adjacent studs.
-
Rule 2 (Clutch Verification): When reinstalling an ABS plate over a line, apply light, even pressure. If the plate rocks or shows an uneven gap, reseat the copper line.
-
Rule 3 (Strain Relief): Leave a 2-3 mm service loop at all major structural hinges so maintenance hatches swing freely without pulling soldered joints.
6. Power Distribution and System Longevity
Operating an extensive LED grid requires clean, consistent power delivery. High-count diode arrays demand reliable DC current to avoid voltage drops across long runs.
[ 5V 2A-3A USB Power Source ]
              │
              ▼
  [ Primary Expansion Hub ]
   │                     │
   ├─► Sektor A: Superlaser Array (Green LEDs)
   │
   ├─► Sektor B: Hangar & Corridors (Cold White LEDs)
   │
   └─► Sektor C: Detention Block & Lower Core (Red/Amber LEDs)
-
Power Supply Requirements: Run the system using a dedicated 5V power adapter (2A to 3A output). Avoid unpowered USB hubs or generic PC monitor ports, which can cause erratic power delivery and uneven diode output.
-
Thermal Dissipation: Solid-state diodes mounted on ABS carrier plates generate minimal warmth under continuous operation. This prevents heat buildup inside enclosed showcases and preserves your original bricks over long-term displays.
-
Standby Management: If using the Fernbedienungs-Version, note that the RF receiver maintains a low micro-amp standby draw. For multi-week absences, unplug the primary USB power feed.
7. Häufig gestellte Fragen (FAQ)
Kann der Einbau die Klemmkraft meiner originalen LEGO® Steine beschädigen?
Nein. Die verwendeten Bauteile bestehen aus formstabilem ABS-Kunststoff und sind exakt auf das Rastermaß abgestimmt. Die Zuleitungen aus feinstem Kupferdraht mit Schutzisolierung haben einen Durchmesser von unter 0,8 mm. Bei ordnungsgemäßer Verlegung in den Vertiefungen zwischen den Noppen entsteht keine mechanische Spannung auf Noppen oder Buchsen, sodass Ihr LEGO mit LED absolut unversehrt bleibt.
Worin liegt der primäre Unterschied zwischen der Classic- und der Fernbedienungs-Version?
Beide Versionen nutzen identische LED-Dioden, Kupferdraht-Leitungen und ABS-Elemente. Die Classic-Version schaltet das gesamte Modell beim Einstecken der 5V-Stromversorgung dauerhaft ein. Die Fernbedienungs-Version integriert zusätzlich einen miniaturisierten RF-Empfänger sowie eine Mehrkanal-Fernbedienung, mit der Sie Lichtintensität, Dimmkurven und einzelne Beleuchtungssektoren unabhängig ansteuern können – die modernste Form professioneller Beleuchtung für LEGO.
Wie wird das Set mit Strom versorgt, und werden Batterien benötigt?
Das Beleuchtungsset wird über ein Standard-USB-Kabel mit 5V Gleichstrom versorgt. Sie können jede handelsübliche Powerbank, einen aktiven USB-Verteiler oder ein standardisiertes 5V/2A-Steckdosennetzteil nutzen. Für Vitrinen empfehlen wir den direkten Anschluss an ein USB-Netzteil, um einen unterbrechungsfreien Betrieb ohne Batteriewechsel sicherzustellen.
Muss ich das Modell 75419 beim Einbau komplett zerlegen?
Nein. Das Set ist modular für die Nachrüstung an einem bereits aufgebauten Modell konzipiert. Es müssen lediglich gezielt einzelne Deckplatten, Wandpaneele und Deko-Elemente an den jeweiligen Stationen abgenommen und nach dem Einlegen der Kupferdrähte wieder fixiert werden. So gelingt der Einbau von LED in LEGO auch bei komplexen Großmodellen mühelos.
Sind die Kabel von außen im Regal oder in der Vitrine sichtbar?
Bei sorgfältiger Montage entlang der inneren Technic-Träger und innerhalb der Spaltmaße der ABS-Platten sind die Zuleitungen nahezu unsichtbar. Alle Drähte sind mit einer matten, unauffälligen Isolierung versehen, die sich nahtlos in die dunklen und grauen Hohlräume des Modells einfügt und für makellose LEGO Lights Optik sorgt.
Bring Galactic Scale to Your Collection
The LEGO® Star Wars Death Star Set 75419 represents a major investment in time, space, and shelf real estate. Leaving this 9,000-piece flagship in static shadow misses the cinematic drama that made the Imperial battlestation iconic in 1977.
By integrating precision multi-strand copper wiring, durable ABS carrier blocks, and tailored micro-illumination, you transform a grey scale model into an illuminated showcase centerpiece. Ob als stimmungsvolle LEGO Lampe auf dem Sideboard oder als detailgetreues Sammlerstück mit modernster Beleuchtung LEGO: Ein hochwertiges LEGO LED Kit erweckt die unvergessenen Szenen aus Episode IV zu neuem Leben.
Choose the configuration that matches your display environment, clear your workbench, and illuminate the ultimate power in the galaxy:
-
Order the LED-Beleuchtungsset für LEGO® Star Wars Todesstern 75419 Classic-Version for reliable continuous display lighting.
-
Upgrade to the LED-Beleuchtungsset für LEGO® Star Wars Todesstern 75419 Fernbedienungs-Version for adjustable dimming and wireless sector control.